
Are you planning a kitchen remodel in the Prescott area and wondering, “What are the best kitchen lighting ideas for my space?” You're in the right place. Proper lighting is one of the most impactful parts of any kitchen renovation. It makes the space more functional for cooking, safer for your family, and creates a warm, inviting atmosphere for gathering. A well-lit kitchen uses a layered approach, combining different types of light to eliminate shadows and highlight your beautiful new countertops and cabinets.
For nearly two decades, Able & Ready Construction has helped homeowners across Prescott, Prescott Valley, Chino Valley, and Dewey-Humboldt solve this exact challenge. As a full-service general contractor specializing in kitchen remodels (ROC #286905), we guide our clients through every step, from creating a smart lighting plan to selecting the perfect fixtures. We understand the unique considerations for Arizona homes, and our faith-based team is dedicated to delivering thoughtful design and meticulous craftsmanship on every project.
This guide shares our direct, field-tested insights on 10 powerful kitchen lighting ideas to inspire your project. We’ll cover everything from strategic recessed lighting and practical under-cabinet LEDs to selecting the right size pendant for your island. Let's illuminate the possibilities for your home.
What are the three layers of kitchen lighting?
The three essential layers are ambient, task, and accent lighting.
- Ambient Lighting is the overall, general light for the room, often provided by recessed cans or a central fixture. Its purpose is to make the space safely navigable.
- Task Lighting is focused, direct light for specific work areas, like countertops, the sink, or the island. This is where under-cabinet lights and pendants are crucial for safety and function.
- Accent Lighting is directional light used to highlight architectural features, artwork, or a beautiful backsplash, adding depth and a custom feel to the design.
A great kitchen lighting plan, like the ones we design for homes in Prescott and Prescott Valley, seamlessly combines all three layers for a space that is both beautiful and highly functional.
1. Recessed Lighting with Dimmer Controls
Recessed lighting, also known as can lights, is a cornerstone of modern kitchen design. These fixtures are installed into the ceiling, creating a flush profile that provides excellent general (ambient) illumination without visually cluttering the space. This minimalist approach is one of the most effective kitchen lighting ideas for establishing a clean, open feel, especially in contemporary homes common in Prescott Valley.

The true power of recessed lighting is unlocked when paired with dimmer controls. Why does this matter? This combination provides unmatched flexibility, allowing you to transition from bright, focused light for meal preparation to a soft, warm glow for dining. For homeowners in the Prescott area, this adaptability is key to creating a kitchen that is both a functional workspace and a comfortable gathering spot.
How do you properly space recessed kitchen lights?
To achieve a professional and balanced result, follow these expert tips from our experience at Able & Ready Construction:
- Grid-Based Spacing: For even, shadow-free coverage, plan a grid layout. A good rule of thumb is to space 4-inch fixtures about 4 feet apart and 6-inch fixtures about 6 feet apart.
- Color Temperature: Choose dimmable LED bulbs with a color temperature around 3000K. This provides a warm, inviting light that isn’t too yellow or starkly blue, complementing natural Arizona light beautifully.
- Targeted Illumination: Use adjustable "gimbal" trim rings. These allow you to pivot the light source and direct it precisely onto key work areas like countertops.
- Energy Efficiency: Select fixtures with an "Airtight" (AT) and "Insulation Contact" (IC) rating. This is crucial for preventing conditioned air from escaping into your attic, improving your home's overall energy efficiency.
2. Under-Cabinet LED Strip Lighting
Under-cabinet lighting has shifted from a luxury add-on to an essential component of task lighting. Using LED strips mounted beneath upper cabinets is one of the most effective kitchen lighting ideas for eliminating shadows cast by overhead fixtures. This provides bright, direct light across your countertops, making food prep safer and more efficient. It also serves as a beautiful accent, highlighting patterns in granite and adding depth to a custom backsplash.
Why is this lighting a game-changer for ambiance? When dimmed, it casts a soft, elegant glow that makes the kitchen feel warm and inviting, perfect for entertaining. The low-profile nature of LED strips means the focus stays on your beautiful finishes, not the light source itself, offering a clean, high-end look that we often recommend for remodels in Prescott and the surrounding communities.
How do you get a professional look with under-cabinet lights?
Achieving a professional-grade installation requires attention to detail. Follow these tips from our team at Able & Ready Construction for a flawless finish:
- Plan Ahead: For the cleanest installation, plan the wiring before your cabinets are installed. This allows an electrician to hardwire the system and conceal all connections for a seamless look.
- Choose the Right Color: A color temperature of around 3000K (warm white) is ideal. It complements the ambient light from recessed fixtures and creates a welcoming atmosphere.
- Diffuse the Light: Raw LED strips can create distracting "hot spots" on glossy countertops. Install the strips inside an aluminum channel with a frosted diffuser cover to create a smooth, even line of light.
- Smart Integration: Consider connecting your lights to a dimmer switch for full control. For added convenience, motion sensors can be installed to turn lights on automatically when you enter the kitchen.
Properly installed under-cabinet lighting works in concert with your other lighting layers. It's a critical detail when you learn how to choose kitchen cabinets for your remodel.
3. Pendant Lighting Over Kitchen Islands
Pendant lights are fixtures suspended from the ceiling that act as both functional task lighting and a powerful design statement. Hung over a kitchen island, they become a stunning focal point. This is one of the most impactful kitchen lighting ideas for defining the kitchen zone in an open-concept layout and adding a touch of elegance or rustic charm.
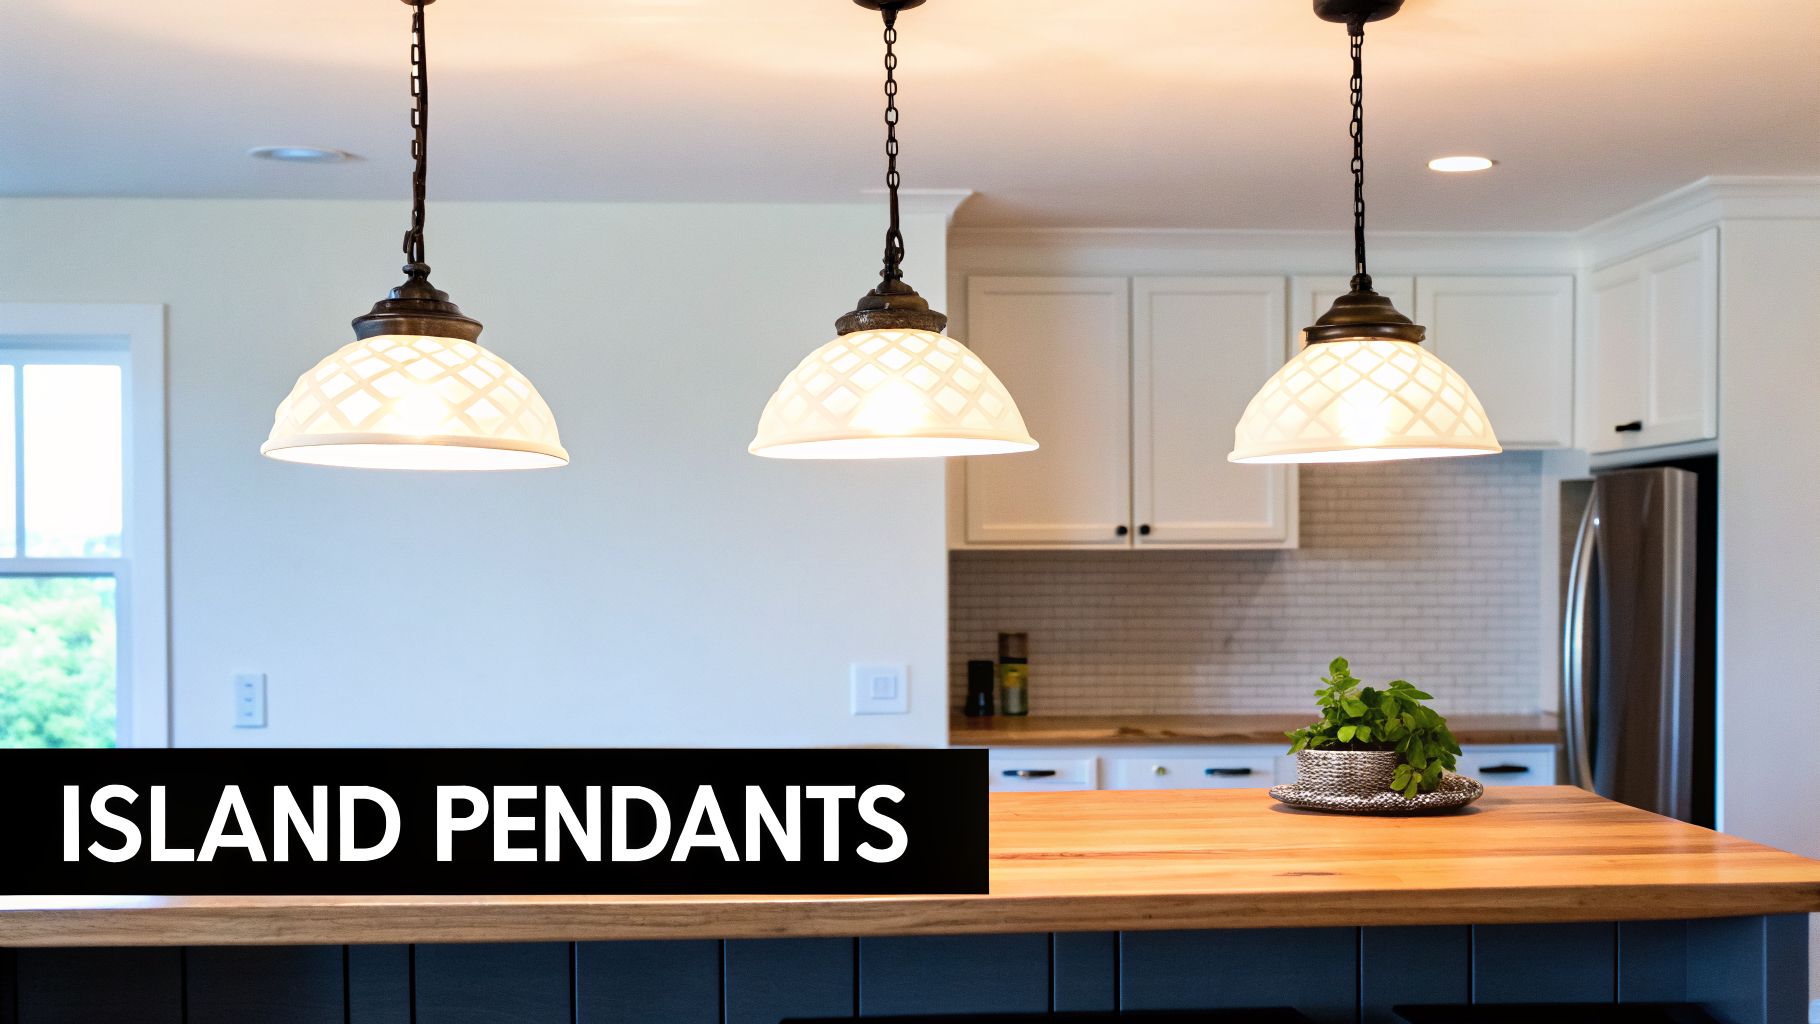
The versatility of pendants allows them to fit any aesthetic. In Prescott Valley farmhouse kitchens, we often install rustic metal pendants. For contemporary remodels, clients prefer sleek, minimalist fixtures. Pendants provide crucial task lighting for meal prep while creating a cozy ambiance for casual dining at the island, making them a staple in our whole-home renovations.
How high should you hang pendant lights over an island?
To ensure your island pendants are both beautiful and practical, our team at Able & Ready Construction recommends the following:
- Height & Placement: Position the bottom of the pendants 30 to 36 inches above the island countertop. This provides ample light without obstructing views across the kitchen.
- Optimal Spacing: For smaller islands, two pendants often suffice. For longer islands (over 6 feet), a grouping of three creates better visual balance.
- Shade Selection: Choose shades that direct light effectively. Opaque shades create a focused downlight perfect for tasks, while glass shades offer a softer, more ambient glow.
- Cohesive Finishes: Match the pendant's finish (e.g., black, nickel, brass) to other hardware like cabinet pulls and faucets. For more on creating a unified look, explore these 6 popular backsplash styles.
- Dimmer Integration: Always install pendants on a dimmer switch to adjust the brightness from functional task light to a subtle, warm glow.
4. Track Lighting Systems
Track lighting offers an exceptional blend of modern aesthetics and functional adaptability, making it one of the most versatile kitchen lighting ideas available. This system involves a ceiling-mounted rail that powers individual light fixtures, or heads, which can be positioned and aimed anywhere along the track. This provides a highly flexible solution for layered lighting in multi-use kitchens, from Prescott Valley to Chino Valley.
Why is track lighting so useful? Its primary advantage is its ability to provide both ambient and task lighting from a single fixture. You can aim some heads at the ceiling for general illumination while directing others onto countertops, islands, or sinks. This directional control is also perfect for creating accent lighting, drawing attention to a beautiful backsplash or custom cabinetry.
How do you use track lighting in a kitchen?
To maximize the benefits of a track lighting system, our team at Able & Ready Construction recommends the following approach:
- Strategic Placement: Install the track parallel to your primary work area, like a kitchen island or a long stretch of countertop, to reduce shadows.
- Modern Finishes: For a clean, contemporary look that complements many Arizona homes, choose finishes like matte black or brushed nickel.
- Fixture Spacing: Space the individual light heads approximately 24 to 36 inches apart, depending on the beam spread of the bulbs.
- Highlighting Features: Use dedicated accent heads to specifically highlight architectural details or decorative elements, adding depth to your kitchen.
- Smart Integration: Combine your system with dimmable heads and smart controls for effortless adjustment of lighting scenes.
5. Statement Chandelier Lighting
A statement chandelier serves as the jewelry of the kitchen, acting as a stunning centerpiece that provides ambient light while defining the room's design personality. This approach is one of the most impactful kitchen lighting ideas for creating a gathering spot, especially in transitional kitchen-dining areas or larger, open-concept homes common in Prescott Valley.
While providing general illumination, a chandelier’s primary role is aesthetic. Whether you prefer the rustic charm of a wrought iron fixture for a farmhouse kitchen or a sleek, geometric design for a contemporary remodel, the right chandelier ties all your design elements together. It signals that the kitchen is not just a workspace but the heart of the home.
How do you choose the right size chandelier?
To ensure your chandelier looks intentional and professional, consider these key tips from our Able & Ready Construction design team:
- Proper Sizing: For fixtures over a table or island, the chandelier should be about 12 inches narrower than the surface's narrowest point to avoid looking oversized.
- Hanging Height: Position the bottom of the fixture 30 to 36 inches above a dining table or island. In open areas, ensure at least 7 feet of clearance from the floor.
- Finish Coordination: Match the chandelier’s finish to other hardware in the kitchen, like cabinet pulls and faucets, to create a cohesive look.
- Structural Support: Chandeliers can be heavy. Always have a licensed electrician verify that the ceiling joist and electrical box can support the fixture's weight. This is a crucial safety step we never skip.
- Layered Lighting: A chandelier provides wonderful ambient light, but it should be combined with other layers, like recessed cans for general brightness and under-cabinet lights for task illumination.
6. Linear Island Fixtures and Bar Lights
For kitchens featuring a large island or peninsula, a linear fixture provides a sleek, unified lighting solution. These long, horizontal lights offer a distinctly contemporary alternative to multiple pendants, delivering broad and even illumination across the entire work surface. This style is one of the most impactful kitchen lighting ideas for reinforcing a clean, modern aesthetic, making it a popular choice for new homes and remodels throughout Prescott Valley.
The primary benefit of a linear fixture is its ability to cast consistent light without the visual "busyness" of several individual lights. This minimalist approach is ideal for open-concept layouts where the kitchen island serves as a multi-purpose hub for cooking, dining, and socializing.
How do you choose a linear light fixture?
To ensure your linear fixture is both functional and stylish, consider these guidelines we follow at Able & Ready Construction:
- Proper Sizing: The fixture's length should be proportional to the island. A good guideline is to choose a light that is about two-thirds the length of the island.
- Mounting Height: For unobstructed views and effective task lighting, hang the fixture so the bottom is 30 to 36 inches above the countertop.
- Cohesive Finishes: Match the fixture’s finish with other hardware in the kitchen, such as cabinet pulls, faucets, and appliance handles.
- Glare Reduction: Opt for fixtures with a frosted or opal glass diffuser. This softens the light and reduces harsh glare on glossy countertops.
- Dimmer Compatibility: Always install linear fixtures on a dedicated dimmer switch to adjust the brightness from functional task lighting to a soft, atmospheric light.
- Structural Support: Before installation, it is critical to have a licensed electrician verify that the ceiling junction box can support the fixture's weight.
7. Ceiling Fan with Integrated Lighting
A ceiling fan with an integrated light kit is a smart, dual-function solution that merges general ambient lighting with crucial air circulation. This is particularly valuable in Arizona’s warm climate, where promoting airflow can improve comfort. For many homes in Prescott Valley, this is one of the most practical kitchen lighting ideas for maintaining a comfortable environment year-round.

This approach is perfect for larger kitchens or great rooms where a single fixture needs to perform multiple duties. The fan helps distribute conditioned air, while the light provides the foundational glow for the entire room. Choosing a model that fits your home’s aesthetic ensures it enhances the design, making the space both functional and stylish.
What should you consider when installing a ceiling fan in the kitchen?
To properly integrate a ceiling fan into your kitchen design, our team at Able & Ready Construction recommends focusing on safety, scale, and style:
- Ensure Proper Support: A licensed electrician must verify that the ceiling joist can support the weight and motion of the fan. This is a non-negotiable safety step.
- Maintain Clearance: For safety and optimal airflow, mount the fan so its blades are at least 8 to 9 feet above the floor.
- Choose Modern Designs: Select a fan with a low-profile blade design and a sleek finish like matte black or brushed nickel to match your other fixtures.
- Prioritize Smart Controls: Opt for a model with a dimmable LED light kit and smart controls to adjust both light intensity and fan speed via a remote, wall panel, or app.
While a ceiling fan provides excellent ambient light, it should be layered with other sources like under-cabinet and pendant lights.
8. Wall Sconces for Ambient and Accent Lighting
Wall sconces are wall-mounted fixtures that serve as a stylish and functional layer of light. Often overlooked, sconces are one of the most versatile kitchen lighting ideas for adding architectural interest, defining spaces, and highlighting features. They provide a soft, diffused glow that contributes to both ambient and accent lighting, making the kitchen feel more inviting. In transitional or farmhouse-style kitchens common in the Prescott area, sconces can be a defining design element.
What is the main purpose of wall sconces in a kitchen? Their primary role is to add depth and warmth that overhead lights alone cannot achieve. They draw the eye, break up large expanses of wall, and create pockets of light that make a space feel more intimate. By flanking a window, a range hood, or an entryway, sconces create visual symmetry and a high-end, custom look.
How do you use wall sconces in a kitchen?
To integrate wall sconces effectively into your kitchen design, our team at Able & Ready Construction recommends the following:
- Optimal Height: Install sconces so the center of the fixture is approximately 60–66 inches from the finished floor to place the light source at a comfortable eye level.
- Symmetrical Spacing: When using sconces in pairs, such as around a sink or doorway, space them 36–40 inches apart to create a balanced composition.
- Coordinated Finishes: Choose finishes that complement or match your cabinet hardware, faucets, and other light fixtures.
- Softer Light Distribution: Opt for fixtures with frosted glass or fabric shades. These materials diffuse the light, casting a gentle, even glow.
- Layered Approach: Wall sconces work best as part of a layered lighting plan, supplementing general illumination from recessed lights and task light from under-cabinet strips.
9. Smart and Automated Lighting Control Systems
Intelligent lighting represents the next evolution in kitchen functionality. Smart systems, using connected bulbs, dimmers, and hubs, allow you to control your kitchen's entire lighting scheme via an app, voice commands, or pre-programmed schedules. This is one of the most forward-thinking kitchen lighting ideas for homeowners in Prescott Valley who value convenience and energy management.
What is the real benefit of smart lighting? The ability to create and recall "scenes." With a single tap or voice command like "Hey Google, start cooking," you can instantly switch from a dim "Morning" scene to a bright, cool-toned "Meal Prep" scene. This level of control allows your kitchen to support your daily routines.
How do you get started with smart kitchen lighting?
To integrate an intelligent lighting system effectively, our team at Able & Ready Construction recommends a planned approach:
- Start Simple: Begin by replacing existing bulbs with smart bulbs. This is a low-commitment way to test a platform (like Philips Hue or Google Home) before committing to hardwired components.
- Ensure Connectivity: A reliable Wi-Fi mesh system is essential for consistent, lag-free performance in larger homes.
- Create Activity-Based Scenes: Program lighting settings for specific activities: "Cooking," "Entertaining," "Cleaning," and "Night Light."
- Plan for the Future: During a renovation, plan your circuits with smart controls in mind. Understanding how to integrate and wiring low-voltage lighting systems can be highly beneficial for smart control.
- Professional Installation: For hardwired smart dimmers or complex systems, always consult a licensed electrician to ensure safety and proper functionality.
10. Glass Shade and Frosted Diffuser Combinations
Combining glass shades with frosted diffusers is a sophisticated strategy to manage light quality. This approach uses two layers: an outer glass shade for style (like clear or seeded glass) and an inner frosted diffuser to soften the light. This pairing is one of the most effective kitchen lighting ideas for achieving beautiful, glare-free illumination from decorative fixtures like pendants and sconces.
The primary benefit is that you can choose an aesthetically interesting glass shade without worrying about the harsh glare from an exposed bulb. The diffuser scatters the light, creating a comfortable, even glow that is ideal for areas where people gather, like over a kitchen island. For homeowners in Prescott Valley, this technique allows for the use of visually striking fixtures that still provide functional, pleasant light.
How do you prevent glare from kitchen lights?
At Able & Ready Construction, we often specify these combinations in upscale kitchen remodels to create a refined lighting plan. Here’s how to do it right:
- Specify Diffusers for Task Lighting: When using fixtures for task lighting, like pendants over an island, insist on a frosted or opal diffuser to prevent distracting hot spots.
- Choose Textured Glass for Interest: A seeded or hammered glass outer shade adds character when the light is off, while the inner diffuser ensures the light is still soft when it's on.
- Coordinate Fixture Styles: For a cohesive look, use the same type of glass treatment across different fixtures in the kitchen.
- Verify LED Compatibility: Ensure the diffuser material works well with your chosen LED bulb's color temperature, as some diffusers can alter the perceived color of the light.
- Account for Light Output: A diffuser will slightly reduce the total light output of a fixture. Factor this minor light loss into your overall lighting calculations.
This approach elevates a lighting plan from purely functional to truly designer, making it a key element in many remodeling projects we complete in the Prescott area.
Frequently Asked Questions About Kitchen Lighting
What is the best color temperature for kitchen lighting?
A color temperature of 3000K (Kelvin) is widely considered the best for most kitchen applications. It provides a clean, warm white light that is bright enough for tasks but still feels inviting. Avoid anything above 4000K, which can feel sterile, or below 2700K, which may be too yellow for clear visibility.
How many recessed lights do I need in my kitchen?
The number of recessed lights depends on your ceiling height, the size of the lights, and the room's layout. A general rule is to space 4-inch lights 4 feet apart and 6-inch lights 6 feet apart. For an average-sized kitchen, 6 to 8 well-placed recessed lights are often sufficient for ambient lighting. We always create a custom plan for our clients in Prescott to ensure perfect coverage.
Can you have too much light in a kitchen?
Yes. Having too much light, or poorly placed light, can create glare, wash out colors, and cause eye strain. This is why a layered approach with dimmer controls is so important. It gives you the ability to adjust light levels for different tasks and times of day, ensuring the lighting is always just right.
For homeowners in Prescott, Prescott Valley, and the surrounding communities, turning a lighting vision into a professionally executed reality is what we do best. Able & Ready Construction integrates expert lighting design into our full-service kitchen remodeling process, ensuring every fixture is perfectly placed and expertly installed (ROC #286905).
When you are ready to discuss your project, our team is here to help. Contact us through our website at Able & Ready Construction to start planning a kitchen that’s as beautiful as it is functional.

